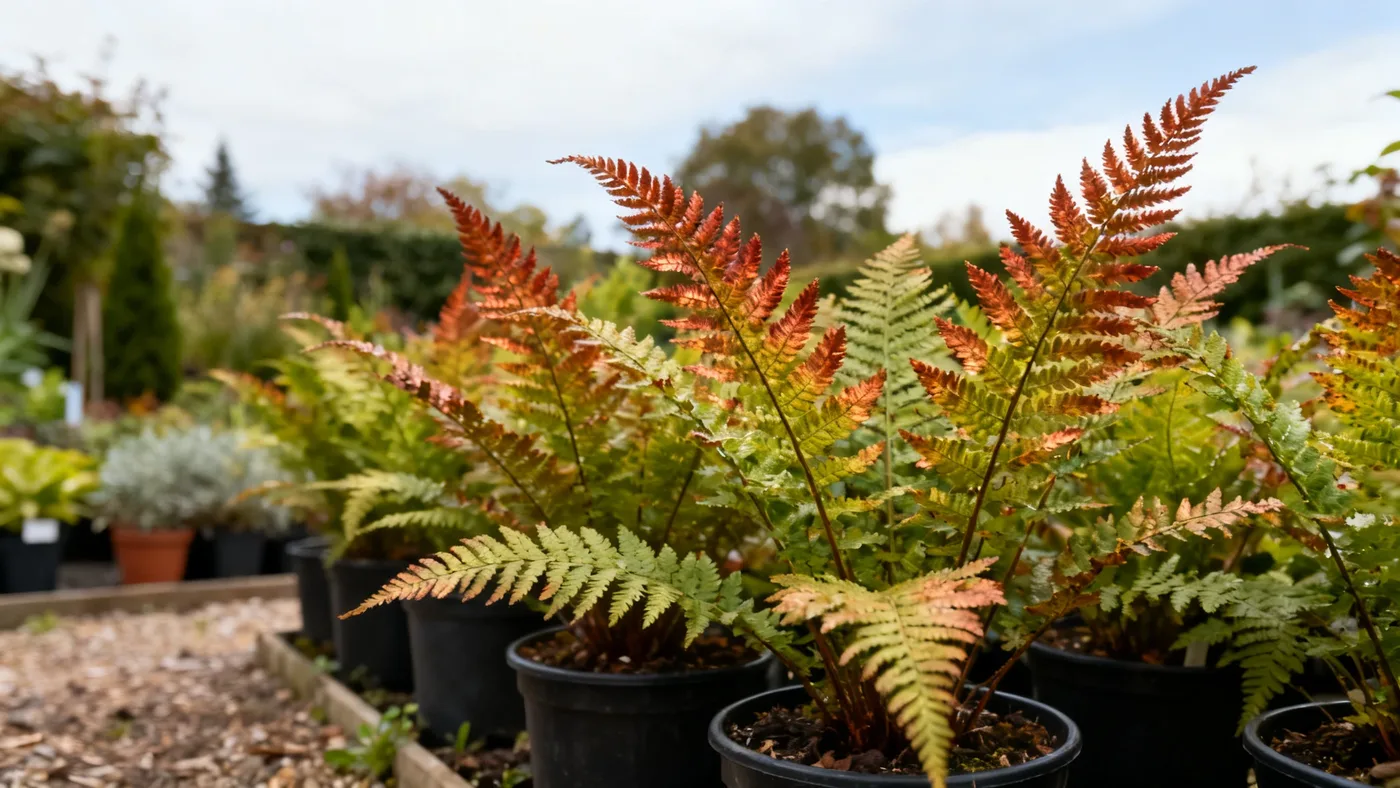
Mulching Brilliance Autumn Fern for Moisture and Weed Control
Mulch is one of the easiest ways to keep your Brilliance Autumn Fern healthy. A proper mulch layer holds moisture during dry spells, keeps soil temperatures steady, and blocks weeds that compete with your fern for nutrients. Since Brilliance Autumn Fern (Dryopteris erythrosora 'Brilliance') prefers consistent moisture and thrives in shaded, organically rich soil, mulching is not optional, it's foundational to success, especially in the first year after planting.
This guide walks you through every step: choosing the right mulch type, preparing your planting area, applying mulch at the correct depth, and troubleshooting common mistakes.
Why Mulch Matters for Brilliance Autumn Fern
Brilliance Autumn Fern is not drought tolerant, especially in its first year. The plant emerges with coppery-red to bronze new fronds and matures to glossy dark green foliage, and it maintains this appearance best when soil stays consistently moist. Mulch creates a buffer between the soil surface and the air, reducing water evaporation on warm days and keeping roots cooler in summer.
Beyond moisture, mulch prevents weeds from establishing around your fern. Weeds compete for water and nutrients, which weakens young plants. As mulch breaks down over months, it enriches the soil with organic matter, exactly what Brilliance Autumn Fern needs for strong, healthy growth.
Mulch also helps regulate soil temperature swings, which is especially valuable in zones 5 and 6 where winter temperatures can dip sharply. A stable soil temperature reduces stress on the rhizome and helps the plant transition smoothly from fall to winter dormancy (or near-dormancy in semi-evergreen mode).
Best Mulch Materials for Brilliance Autumn Fern
Not all mulches are equal for ferns. Choose materials that retain moisture, improve soil structure, and break down into organic matter. Avoid materials that compact, shed oils, or acidify the soil beyond the plant's tolerance.
Top choices
- Leaf mold: Shredded or composted leaves are ideal. They mimic the forest-floor environment where ferns thrive, decompose slowly, and add rich humus. This is the gold standard for Brilliance Autumn Fern.
- Compost: Well-aged compost (6 months old or more) feeds the soil as it breaks down. Use compost that is fully dark and crumbly, not fresh or chunky. Keep it 1 inch away from the crown to prevent rot.
- Composted bark or hardwood bark chips: Small bark pieces (1/2 inch or smaller) hold moisture well and break down at a moderate pace. Avoid thick bark nuggets, which shed water.
- Pine needles: If available, pine needles create an acidic microenvironment suitable for Brilliance Autumn Fern in neutral or alkaline soils. They decompose slowly and add a woodsy texture.
- Wood chips from deciduous trees: A mix of small chips from hardwoods works well. Avoid fresh chips or anything treated with dyes.
Materials to avoid
- Fresh wood chips or sawdust (they compete for nitrogen as they decompose)
- Rubber mulch or plastic (they do not improve soil and trap heat)
- Dyed bark chips (unknown additives may affect soil chemistry)
- Glossy wood chips from pallets (often treated with chemicals)
- Thick bark nuggets (they shed water instead of absorbing it)
- Cocoa hull mulch (toxic if pets ingest it)
Materials and Tools You Will Need
- Mulch material (leaf mold, compost, or bark chips): 1 to 2 cubic feet per plant for mature spacing
- Garden gloves
- A three-pronged cultivator or small hand rake
- A tape measure (to check depth)
- A garden fork or spade (if moving mulch from a pile)
- A bucket or wheelbarrow (to transport mulch to planting beds)
- A flat-bladed shovel (optional, for spreading)
- Landscape fabric (optional; see step 3 for guidance)
Step-by-Step Instructions
Step 1: Prepare the Planting Area
Clear away any existing weeds, dead leaves, or debris from around the base of your Brilliance Autumn Fern. Use your cultivator to lightly loosen the top inch of soil around the plant, breaking up any crusted or compacted earth. This helps water and mulch to settle in contact with the soil.
If the soil is dry, water the area thoroughly before applying mulch. Mulch works best when soil underneath is already moist; it acts as a barrier to retain that moisture. Water until the top 2 to 3 inches of soil feel damp to the touch.
Step 2: Decide on a Landscape Fabric Layer (Optional)
Landscape fabric can suppress weeds and is useful if your planting area has a recent weed history. However, it is not essential for a healthy Brilliance Autumn Fern. If you choose to use it, lay down a single layer of landscape fabric (not black plastic, which traps moisture and heats the soil too much). Cut a hole so the fabric circles the base of the plant 3 to 4 inches away from the crown, and overlap the edges slightly. Stake or pin the edges so it does not shift.
If you decide against fabric, you can apply mulch directly to the soil surface. Mulch alone is effective when you maintain it consistently and remove visible weeds by hand before they establish deep roots.
Step 3: Apply the Mulch Layer
Spread your chosen mulch evenly over the prepared soil, starting at the outer edge of the planting area (about 18 to 24 inches from the crown for a mature plant or slightly less for a young plant) and working inward. Use your hands or a flat shovel to distribute the mulch evenly.
Stop 2 to 3 inches away from the crown of the fern. This critical distance prevents mulch from piling up against the fronds or base of the plant, which can trap moisture and encourage crown rot or fungal diseases. Picture a small circular buffer zone around the center of the plant as a no-mulch zone.
Step 4: Check the Depth
Use your tape measure to confirm the mulch depth. The ideal depth for mulching Brilliance Autumn Fern is 2 to 3 inches. This thickness provides effective moisture retention and weed suppression without becoming so thick that it compacts or excludes air from the soil below.
If you have applied landscape fabric underneath, the mulch sits on top of it and should still measure 2 to 3 inches. If the mulch depth is less than 2 inches, add more. If it exceeds 3 inches, rake away the excess; thick mulch can harbor slugs (which occasionally feed on fern fronds) and may cause the soil to stay too wet.
Step 5: Water Thoroughly After Mulching
Water the entire mulched area to settle the mulch and eliminate air pockets. The mulch will compress slightly as it absorbs water and the soil beneath settles. This first watering is essential to make the mulch layer effective at retaining moisture. Water until the soil 2 to 3 inches below the mulch surface feels damp.
Step 6: Maintain the Mulch Layer Year-Round
Mulch breaks down over time. Check the depth every spring and fall. If the layer has compressed to less than 2 inches, add a fresh 1 inch of mulch. Do not keep adding mulch indefinitely; aim to maintain that 2 to 3 inch sweet spot, not build it up to 5 or 6 inches.
In fall, if you live in zones 5 or 6 where Brilliance Autumn Fern becomes semi-evergreen or dormant, you may add a light additional mulch layer (1 inch) to insulate the soil through winter. In spring (late winter to early spring, before new fiddleheads emerge), pull back the mulch slightly, allowing the soil to warm. You can add fresh compost or leaf mold at this time to replenish what has decomposed.
Tips for Success
- Mulch immediately after planting. This is especially critical in the first year when the plant is establishing roots. Mulch reduces transplant shock and keeps the root zone consistently moist.
- Use mulch that smells like forest floor. Well-aged compost and leaf mold have an earthy, pleasant smell. Fresh compost or bark may smell sour or chemical; if so, age it for a few weeks in a pile before applying.
- In wet climates or poorly drained soil, use less mulch. If your soil already retains moisture well (such as clay-heavy soils), reduce the mulch depth to 1.5 inches to prevent waterlogging.
- Remove mulch from around the crown in late winter. Before new growth emerges in spring, gently pull mulch back 1 to 2 inches from the center of the plant. This lets the soil warm and air circulate, reducing fungal risk. You can replace it once new fronds have unfurled.
- Monitor for slugs and snails. While mulch is beneficial, slugs occasionally shelter in it. If you notice irregular holes in fronds, hand-remove slugs in early morning or use a pet-safe slug bait sparingly near (but not touching) the fern.
- Do not rake away all mulch in fall. Some gardeners worry about mulch and cold winters. A 1 to 1.5 inch layer actually protects the soil and rhizome from extreme temperature swings, which is beneficial in zones 5 and 6.
- Top-dress with compost annually. In spring, as part of your yearly maintenance, rake back the old mulch gently and add 0.5 inch of fresh, well-aged compost. This enriches the soil as the compost decomposes and reinforces the mulch layer in one step.
Common Mistakes to Avoid
- Piling mulch against the crown. This is the most common error. Mulch touching the base of the plant traps moisture and invites crown rot. Always leave a 2 to 3 inch clear zone around the center.
- Using fresh wood chips. These decompose quickly while consuming nitrogen from the soil, which can starve the plant. Always use aged or composted wood materials.
- Applying mulch too deep. More than 3 inches is excessive. It compacts, reduces air exchange, and creates an ideal environment for pests and fungal diseases.
- Forgetting to water before mulching. Dry soil beneath mulch stays dry. Mulch is a moisture barrier, not a moisture source. Water first, then mulch.
- Letting mulch become matted or crusted. If mulch sits wet for weeks without disturbance, it may form a water-resistant crust. Gently rake through the mulch layer in spring to aerate it.
- Using glossy or dyed mulch. Appearance is tempting, but these products are often treated with chemicals that may leach into soil or inhibit plant growth.
Expected Results
After mulching, you can expect to see the following benefits within weeks to months:
- Improved moisture retention: With a 2 to 3 inch mulch layer, you may water 25 to 40 percent less frequently during dry spells, since the mulch reduces evaporation from the soil surface.
- Reduced weeds: Weed seedlings will be fewer and easier to pull. A thick, undisturbed mulch layer blocks light and physical space for weed seeds to establish.
- Healthier frond growth: When soil moisture stays consistent, your Brilliance Autumn Fern emerges with fuller, more vibrant new growth. The coppery-red spring fronds may be more prominent, and the mature dark green color deeper and more glossy.
- Improved soil structure: Over the growing season, mulch breaks down into humus, enriching the soil and making it more crumbly and organically rich, exactly what the plant needs.
- More stable soil temperature: Soil beneath mulch fluctuates less with air temperature swings, reducing stress on the rhizome, especially during cold snaps in zones 5 and 6.
- Slower growth does not accelerate: Note that mulch supports consistent moisture and soil health but does not speed the plant's natural growth rate. Brilliance Autumn Fern reaches mature clump size in about 2 to 3 years regardless of mulch; mulch ensures the plant is as healthy as possible during that timeframe.
For more detailed year-round care of Brilliance Autumn Fern, see the Brilliance Autumn Fern care guide.
Quick Reference: Mulching Checklist
| Task | Timing | Key Details |
|---|---|---|
| Clear weeds and debris | Before mulching (any season) | Remove dead leaves, loosen top 1 inch of soil |
| Water the planting area | Immediately before mulching | Soil should be damp 2-3 inches deep |
| Apply landscape fabric (optional) | Before mulching | Leave 3-4 inch gap around crown |
| Spread mulch | Any season (spring or fall preferred) | 2-3 inch depth, 18-24 inch radius from crown |
| Clear mulch from crown | Immediately after application | Leave 2-3 inch no-mulch zone |
| Water to settle mulch | Right after spreading | Water thoroughly until soil below is damp |
| Check and top up mulch | Spring and fall each year | Maintain 2-3 inch depth; pull back in late winter |
| Top-dress with compost | Spring (after new fronds emerge) | 0.5 inch fresh, well-aged compost mixed into existing mulch |