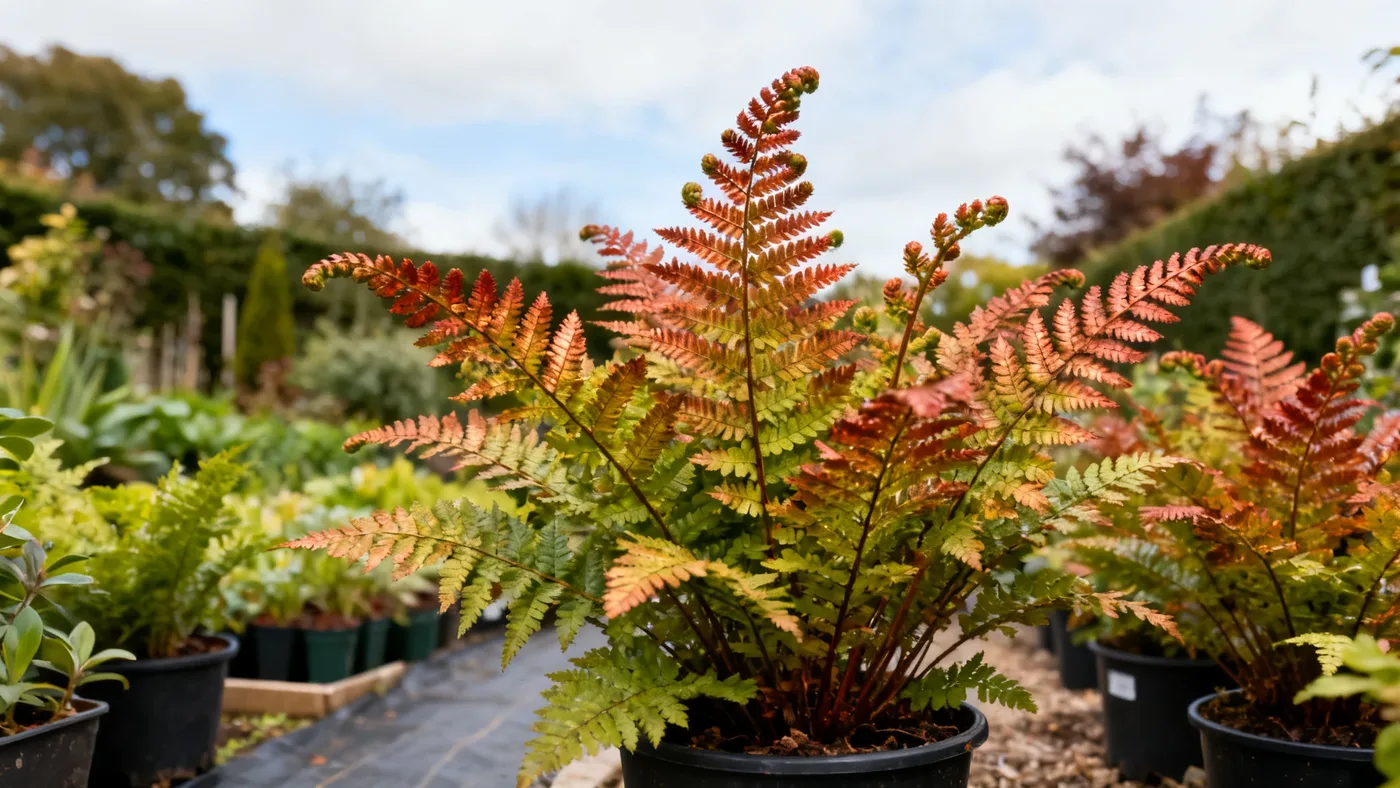
How to Propagate Brilliance Autumn Fern by Division
Division is the most practical way to multiply your Brilliance Autumn Fern collection. Unlike spore propagation (which takes months and requires specialized knowledge), dividing an established clump is fast, reliable, and gives you mature-looking plants within a year. This guide walks you through the process, from timing to planting your new divisions.
Why Divide Your Brilliance Autumn Fern
An established Brilliance Autumn Fern clump reaches about 18 to 24 inches tall and 18 to 24 inches wide over 2 to 3 years. Once your plant hits that size, it's ready for division. Propagating by division gives you several advantages:
- Each division is genetically identical to the parent plant, preserving the cultivar's characteristics.
- Divisions establish faster than seedlings or spore-grown ferns.
- You can expand your shade garden coverage or share plants with other gardeners.
- Division reinvigorates older clumps that may be slowing growth in their center.
When to Divide: Timing Matters
Spring is the ideal window. Divide your Brilliance Autumn Fern in early spring, just as new fiddleheads begin to emerge but before the fronds fully unfurl. This timing, roughly late winter to very early spring, aligns with when you would normally prune away winter-damaged fronds. By dividing then, you minimize shock to the plant and give divisions the entire growing season to settle into their new pots or garden spots.
Fall division is possible in zones 6 through 9, where the plant remains evergreen or semi-evergreen through winter. However, spring remains the safer choice in zone 5, where the fern may struggle to establish roots before hard frost.
Materials and Tools You'll Need
Gather these items before you start:
- A clean, sharp spade or serrated knife for cutting through the root mass.
- A garden fork or digging fork to gently loosen the soil around the clump.
- Potting mix or amended soil: humusy, organically rich, well-drained soil with a pH between 5.5 and 6.5.
- Pots or containers with drainage holes if growing divisions initially in containers.
- A watering can or hose.
- Clean pruners for removing damaged fronds.
- Optional: rooting hormone (not required, but can encourage faster establishment).
Step-by-Step Division Process
Step 1: Water the Parent Plant
Water your Brilliance Autumn Fern thoroughly the day before division. Moist soil makes it easier to work with the root mass and reduces stress on the plant. Let the excess water drain completely.
Step 2: Remove the Entire Clump
Carefully dig around the clump with a garden fork, working 6 to 8 inches out from the base. Gently lever the entire root mass from the soil. You may need to loosen soil on all sides before the clump comes free. If the plant is in a container, tip it onto its side and slide the entire root ball out.
Step 3: Examine the Root Mass
Once the clump is out, rinse away excess soil gently with water so you can see the natural divisions. Look for where new growth crowns naturally separate. A mature clump typically breaks into 3 to 6 usable divisions, depending on size and age.
Step 4: Divide the Clump
Use a sharp spade or serrated knife to cut the clump into sections. Each division should have at least one to three growing points (new fiddleheads or visible crown buds) and a section of roots. Divisions roughly 3 to 4 inches across are ideal. Discard any portions with no visible growth buds or dead, rotted roots.
Step 5: Trim Damaged Fronds
Before potting or replanting, cut away any torn, yellowed, or winter-damaged fronds. Remove fronds at the base where they attach to the crown. This redirects the plant's energy to new growth rather than maintaining damaged foliage.
Step 6: Pot or Plant Your Divisions
For container growing, use pots with drainage holes. Fill with humusy, organically rich, well-drained potting mix. Plant each division at the same depth it was growing before. The crown should sit just at soil level, not buried. If planting directly into the garden, prepare a spot in part shade to full shade with rich, amended soil that stays consistently moist.
Space divisions 18 to 24 inches apart for mass plantings. This gives each plant room to reach its full mature width of 18 to 24 inches over 2 to 3 years without crowding neighbors.
Step 7: Water and Settle In
Water divisions thoroughly right after planting. Keep the soil medium moist for the first 4 to 6 weeks as the roots settle. Avoid waterlogging; the soil should be consistently moist but not soggy. In containers, check soil moisture daily, as pots dry faster than garden beds.
Tips for Success
Divide in morning or on a cloudy day. Bright sun stresses newly divided plants while their roots are establishing.
Keep divisions shaded for the first month. Place potted divisions in a sheltered, shaded spot or under a shade cloth. Transplanted garden divisions should be in part shade to full shade, which is their natural preference anyway.
Be patient with the parent plant. The original clump may look sparse after division, but it will refill within 12 to 18 months with new frond growth.
Fertilize lightly in the second spring. Wait until the second growing season to apply a balanced, slow-release fertilizer. New divisions need time to settle before feeding.
Use a light hand with water. Too much moisture in the soil invites root rot. The key is consistent, even moisture, not soggy conditions.
Common Mistakes to Avoid
Not enough growing points per division is the most frequent error. Small divisions with just one tiny bud take much longer to establish and may not survive the transition. Aim for divisions with clear, visible growth crowns.
Dividing in summer or fall (except in mild zones 8 to 9) stresses plants entering dormancy or slowing growth. Spring is safer.
Planting divisions too deep buries the crown and invites rot. Keep the crown at soil level or slightly above.
Inconsistent watering causes frond scorch or wilting in new divisions. During the first 6 weeks, check soil moisture every 2 to 3 days in containers or after rain in garden beds.
Expected Results and Timeline
New divisions may look modest at first, typically showing 4 to 8 fronds per division. Over the growing season, expect a few inches of new frond growth each year. By the second year, divisions will fill out noticeably. By the third year, divisions reach mature clump size at 18 to 24 inches tall and wide, ready to divide again if desired.
In zones 5, the fern is semi-evergreen to deciduous, meaning fronds may brown or flatten in cold winters. This does not harm the crown or roots. New growth emerges reliably each spring. In zones 6 through 9, where the plant is evergreen or semi-evergreen, divisions retain fronds through winter and provide year-round structure to the shade garden.
Propagation in the Larger Garden Plan
If you are building a shade woodland garden or mass planting under trees, division lets you scale affordably. A single mature Brilliance Autumn Fern clump yields 3 to 6 divisions. In one season, you can create a small grouping from one plant. Combine your new divisions with companion plants like hostas, heucheras, and astilbes to fill a shaded border quickly. For more on caring for your divisions once established, see our Brilliance Autumn Fern care guide.
Quick Reference: Division Checklist
| Task | Timing / Details |
|---|---|
| Best season to divide | Early spring, just as fiddleheads emerge; late winter to very early spring |
| Parent plant readiness | 18-24 in tall and wide, or 2-3 years of growth |
| Divisions per mature clump | 3-6 usable sections |
| Growing points per division | At least 1-3 visible crowns or fiddleheads |
| Spacing in garden or containers | 18-24 in apart |
| Soil type | Humusy, organically rich, well-drained; pH 5.5-6.5 |
| Initial watering frequency | Keep consistently moist for first 4-6 weeks |
| Shade level for new divisions | Part shade to full shade |
| Time to full maturity | 2-3 years to reach 18-24 in clump size |
| First fertilizer application | Second growing season; light, balanced, slow-release |
| Hardy in zones | 5-9 |